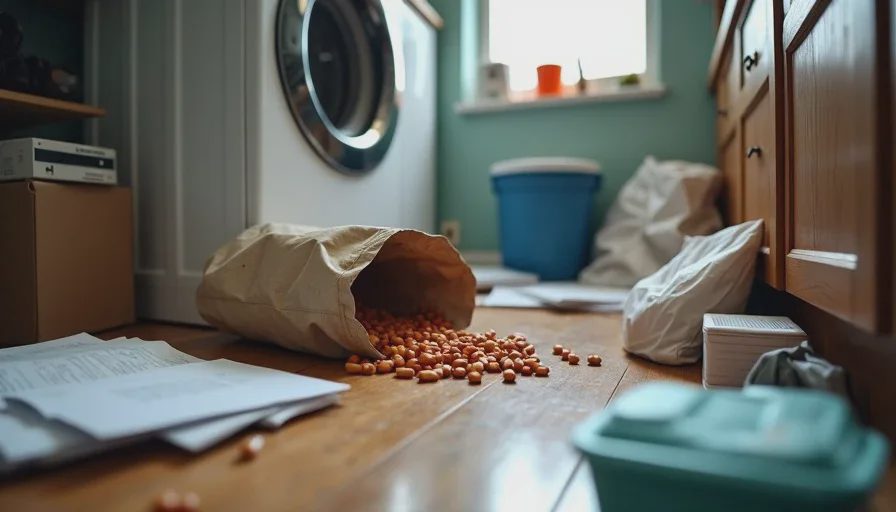
About three weeks into pet ownership, I realized I had a problem.
The dog food bag was propped against the wall in the laundry room, spilling kibble across the floor. The cat's food was in a different cabinet, but I kept forgetting which bag was which. Medication bottles—flea prevention, dewormer, leftover antibiotics—were scattered across the kitchen counter, the bathroom shelf, and the top of the fridge. Wet wipes lived in three different rooms because I kept buying multipacks and shoving them wherever they'd fit.
And the paperwork? Vaccination records, adoption papers, microchip information, and vet receipts were in a messy pile on my desk, mixed in with school forms and old utility bills. I spent 20 minutes searching for the cat's rabies certificate before her first vet appointment.
I learned this one the messy way.
My house had been taken over by pet stuff. Not because I had too much—but because I had no system. Every time I needed something, I had to hunt for it. Every time I bought something, I just found an empty corner to shove it in.
If you're drowning in pet supplies and paperwork, I see you. Here's the simple, low‑cost storage system that finally gave me back my sanity—and my counter space.
The Problem: Stuff Spreads When You Don't Have a Home for It
Before I created a system, here's where things ended up:
Food: Giant bag in the laundry room (spilling), smaller backup bag in the pantry (forgotten), open bag of treats on the counter (getting stale).
Medications: Flea medicine in the bathroom drawer, heartworm pills in the kitchen cabinet, emergency meds on the fridge, and no way to track what was given when.
Wipes and cleaning supplies: Under the sink (hard to reach), in the car (forgot to restock), in the laundry room (mixed with cleaning products).
Paperwork: Adoption papers in a drawer, vaccination records in a file folder, vet receipts scattered, microchip info lost in my email inbox.
The result? I bought duplicates of things I already had. I missed doses of medication. I couldn't find records when I needed them. I was wasting money, time, and brain space.
Here's the system that fixed it.
Step 1: Choose One Central Location (The "Pet Station")
The single most important decision I made was to create one designated spot for all pet supplies. Not multiple locations. Not "whatever's convenient." One central hub.
Where I chose:
The laundry room. It's near the back door (where the dog goes out), has a countertop, and has a cabinet for storage. It's also out of the main living area, so pet stuff doesn't clutter up our kitchen or living room.
Alternate options:
A mudroom or entryway closet.
A section of the pantry.
A bathroom cabinet (if you have space).
A dedicated rolling cart or storage bin that lives in a corner.
The rule: All pet supplies go here. If it doesn't fit, you don't buy more until you use what you have. This one rule stopped my accumulation problem overnight.
Step 2: Organize Pet Food (Dry + Wet + Treats)
Food was my biggest mess. Here's how I tamed it:
For dry kibble:
I transferred the kibble from the giant bag into airtight food storage containers with sealing lids. One large container for the dog's food, one medium container for the cat's food.
I keep the containers on a sturdy shelf above the bowls, not on the floor (where they get kicked and spilled).
I label each container with the type of food and the expiration date (using a piece of tape and a marker).
For wet food (cans/pouches):
I keep a small bin (a plastic storage basket) on the same shelf. Cans go in there, organized by type.
I rotate them so the oldest ones are at the front.
For treats:
I have a small jar or container for daily treats (near the leashes for easy access).
The backup treats (bulk bags) go in a labeled bin on the shelf.
Pro tip: I bought a permanent marker and a roll of masking tape. Everything gets a label. It sounds obsessive, but it means I never grab the wrong bag or let food go stale.
Cost: About $40 for two airtight containers and a few storage bins. Worth every penny.
Step 3: The Medication System (No More Missed Doses)
Medications were the second biggest source of chaos. Here's my foolproof system:
What you need:
A small storage box or a drawer organizer (with dividers) for all meds.
A pill organizer (the kind with days of the week) for monthly preventatives.
A permanent marker for labeling.
My setup:
In a small plastic bin on the shelf, I have:
Monthly flea/tick/heartworm preventatives (boxed, labeled with the next due date).
Any as‑needed meds (anti‑nausea, antibiotics, etc.) with clear labels and expiration dates.
A small notepad and pen for tracking doses.
On the wall next to the bin, I stuck a dry‑erase calendar where I mark:
Monthly flea/heartworm dose dates (dog and cat).
Annual vaccine due dates.
Any upcoming vet appointments.
My monthly routine:
On the 1st of every month, I give both pets their preventatives.
I write the date on the calendar and on the pill packaging (so I know when I gave it).
When I open a new box, I write the expiration date on the box with a marker.
Pro tip: If you have multiple pets, use different colored markers or stickers for each pet's meds. Dog = blue, cat = red. Makes it impossible to mix them up.
Step 4: Wipes, Cleaning Supplies, and Grooming Tools
Wipes and cleaning supplies used to be scattered everywhere. Now they're consolidated:
In a bin under the shelf (or in a cabinet nearby):
Pet wipes (for paws, faces, and general cleanup) – one open pack ready to use, plus backup packs.
Enzyme‑based stain remover (the only thing that actually works on accidents).
Paper towels (a roll always within reach).
Poop bags – a bulk box, plus a small roll in a dispenser attached to each leash.
Grooming tools – brush, nail clippers, ear cleaner, and toothbrush.
A small spray bottle of plain water for spot cleaning.
Where I keep it:
A plastic tote with a lid (so it looks tidy) that sits on the floor under the shelf. When I need to clean up a mess, I grab the whole tote and bring it to the scene.
Pro tip: I keep a small bin near the back door with just a roll of poop bags, a pack of wipes, and a spare towel. That way, I don't have to go to the laundry room every time we come in from a muddy walk.
Step 5: The Paperwork System (No More Searching)
This was the biggest sanity‑saver. I used to dig through piles of papers every time I needed a vaccination record. Now I have a dedicated system:
What you need:
A file folder or a small binder with clear plastic sleeves.
A pocket folder for receipts and loose papers.
A digital backup (scan or take photos of important documents).
My setup:
I have a single file folder labeled "PETS" that lives in the cabinet near the meds.
Inside, I have separate sections for each pet:
Adoption papers (contract, microchip number, shelter info).
Vaccination records (with dates of each shot and next due date).
Vet visit summaries (dates, reason for visit, treatments given).
Insurance policy (if you have it) or emergency vet info.
Any specialist referrals or allergy test results.
On the inside cover of the folder, I taped a quick‑reference card with:
Each pet's microchip number and company phone number.
Vet clinic name, address, and after‑hours number.
Emergency vet name, address, and phone number.
Poison control number.
Digital backup:
I took photos of every document and saved them in a folder on my phone called "Pet Records." I also emailed copies to myself so I can access them anywhere.
Pro tip: Every time you visit the vet, ask for a printed summary and add it to the folder the same day. Don't let it pile up.
Step 6: The "Travel Kit" (For When You Leave the House)
I used to scramble every time we needed to leave the house—for a vet visit, a day trip, or an overnight stay. Now I have a pre‑packed travel kit that lives near the pet station.
What's in it:
A small bag or zippered pouch with:
A few days' worth of food (in a sealed bag).
A collapsible water bowl.
A small pack of treats.
A roll of poop bags.
A small container of wipes.
Any medications needed for the trip (with a note of the dose).
A printed copy of vaccination records (just in case).
How it works:
When we travel, I grab the main food container, the travel kit, and the pet's bedding. Everything else is already packed. No last‑minute scrambling, no forgotten items.
The Full Setup (What It Looks Like Now)
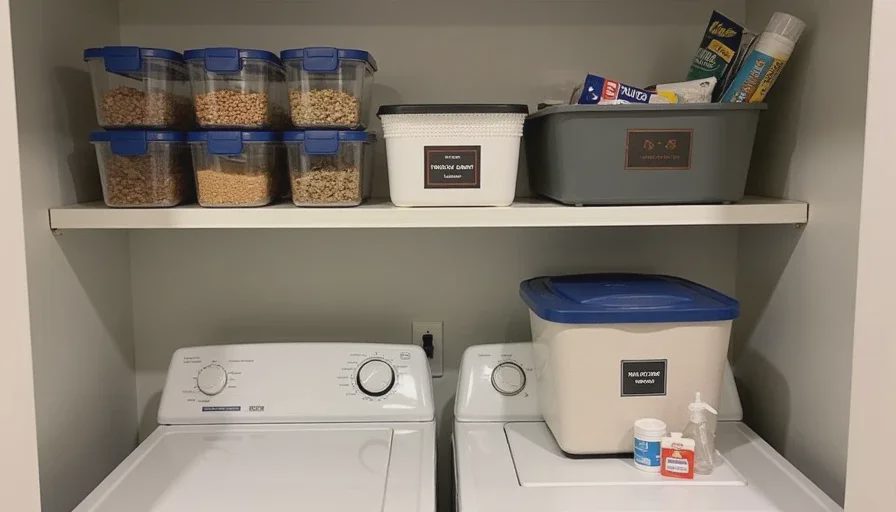
Here's my entire pet storage system at a glance:
Item | Location |
|---|---|
Dry kibble (dog + cat) | Airtight containers on laundry room shelf |
Wet food cans | Plastic bin on the shelf |
Treats (daily use) | Small jar near leashes |
Treats (backup) | Labeled bin on the shelf |
Medications | Small organizer bin on shelf + dry‑erase calendar on wall |
Wipes, cleaners, grooming tools | Plastic tote under shelf |
Poop bags | Bulk box in tote + dispenser on each leash |
Paperwork | File folder in cabinet |
Travel kit | Packed bag on shelf (ready to grab) |
Extra bedding/towels | Shelf above washing machine |
Total cost: About $60 for containers, bins, and the file folder.
Total time to set up: Under an hour.
Ongoing maintenance: 2 minutes a day to put things back where they belong.
The One Rule That Keeps It Working
Here's the rule that makes this system actually sustainable:
"Everything has a home, and everything goes home after use."
If I use a wipe, I put the pack back in the tote. If I give a pill, I record it and put the bottle back in the med bin. If I come back from the vet, I file the paperwork the same day.
No exceptions. No "I'll put it away later." Because "later" never comes, and then the chaos creeps back.
It sounds simple, but it took me a long time to actually commit to this. Now it's a habit. And my house stays organized without any effort.
What If You Don't Have a Laundry Room?
Not everyone has a dedicated laundry room or mudroom. Here are alternative setups for small spaces:
Option A: Rolling Cart
A 3‑tier rolling cart (from IKEA or Amazon) can fit in a closet, a corner, or even a bathroom. Top tier: treats and daily supplies. Middle tier: medications and grooming tools. Bottom tier: wipes and cleaning supplies.
Option B: Cabinet in the Kitchen or Bathroom
Clear out one cabinet and designate it as the "pet cabinet." Use stackable bins and shelf risers to maximize vertical space.
Option C: Large Storage Tote
If you have no cabinet space, a large plastic tote with a lid can hold everything. Store it in a closet, under a bed, or in the garage. Just make sure it's easy to access.
Option D: Over‑the‑Door Organizer
Hang an over‑the‑door shoe organizer on the back of a closet or pantry door. Each pocket can hold a different supply: one for wipes, one for treats, one for poop bags, one for medications.


Letters
No letters yet. Yours could be the first.